STEAM Ahead - Engineering STEAM Kits

STEAM KIT INTRODUCTION: 

This STEAM kit is designed to introduce students to the core concepts of engineering, wind and electronics. Your STEAM kit has the materials for you to complete three activities: build an anemometer, design a LED card, and build a hovercraft.

Select your activity below for instructions and additional information:


Build an Anemometer

An anemometer is a device used to measure wind speed and wind pressure. There are different types of anemometers, but the most common type is the cup anemometer. A cup anemometer has three or four cups mounted on a vertical pole. The cups capture the wind which rotates the pole. The wind speed is determined by counting the number of rotations over a specific time period. An anemometer can be manual or digital.

There are many different uses of an anemometer, such as:

  • Meteorology - Used for weather forecasting, climate research and other meteorological applications.

  • Wind Farms and Turbines - Used to determine the best location for wind power generators and turbines. Also, large wind turbines even have built-in anemometers to measure wind speed and stop the turbines from rotating if the wind blows too fast.

  • Coal Mines - Used to determine how much airflow is entering or exiting mines. This helps ensure miners have good ventilation and enough air to breathe while underground.

  • Construction - Used to assess the wind around a building to determine its structural design and wind resistance.

Did you know?

  • The word ‘anemometer’ comes from the Greek word for wind, which means anemos?

  • NASA is considering a mission to Venus that would use an anemometer to measure wind speed on the planet to gain insight into Venus' surface and atmosphere.


Design Challenge:

Become a metrologist and build an anemometer to measure the wind speed at various locations around your home and school.

  • Measure the wind speed by counting the number of times the anemometer spins around in a minute (rotational rate).

  • Find 2 - 3 locations around your home or school. Using your anemometer, take three measurements at each location. Calculate the average rotational rate of your anemometer at each location. Which locations had the highest and lowest rotational rates?

Materials:

  • 5 - 3 oz paper cups

  • 2 - Straws

  • 1 - Pushpin

  • 1 - Sharpened pencil with eraser

  • 1 - Pen or Marker


Build Instructions:

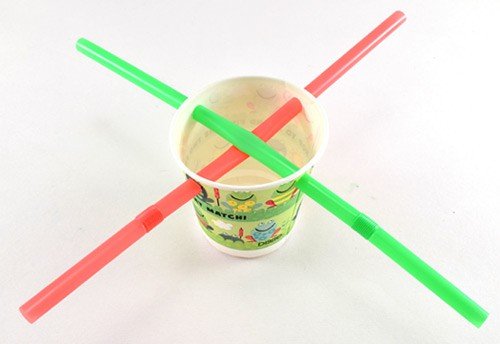
  1. Use the tip of a sharpened pencil (or a hole punch) to punch four holes in a paper cup just below the rim, forming a "+" shape (two pairs of holes opposite each other).

  2. Press two straws through the holes (See Figure 1)

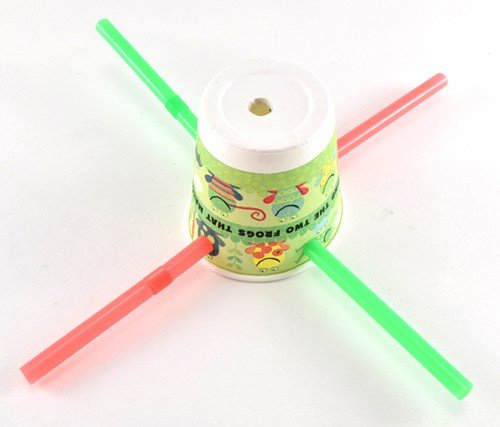
  3. Use a sharpened pencil to poke a hole in the center of the bottom of the cup (See Figure 2)

  4. Use the pencil to punch two adjacent holes in each of the other four cups. The holes should be about 2–3 cm apart, and about halfway along the cup's height (See Figure 3)

  5. Push the end of a straw through the two holes in each one of the cups, as shown in Figure 3. Make sure the cups are all facing in the same direction (all clockwise or all counterclockwise). There should be enough friction to hold the cups in place so they do not twist on the straws. If the cups twist easily, use a bit of tape to secure them.

  6. Push the pencil, eraser end first, through the hole in the bottom of the central cup.

  7. Press a pushpin lightly through both of the straws and into the eraser, as shown in Figure 4. Do not press the pushpin into the eraser all the way, or there will be too much friction and your anemometer will not spin.

  8. Use a pen or marker to draw an easily recognizable symbol (for example, a dark circle or band) on the side of one of the cups, so you can easily tell it apart from the other cups. This will make it easier to count revolutions when the anemometer is spinning.

Build instructions provided by ScienceBuddies


Submit Your STEAM Kit Build Feedback:

After you complete your STEAM Kit Build, complete the feedback survey to be entered into a quarterly raffle!


Design a LED Card

Electricity is the flow of electrical power or charge. A circuit is a complete circular path that electricity flows through. A simple circuit contains three components: a source of voltage, a conductive path and a resistor. There are three types of electric circuits:

  • Open Circuit - an electrical circuit that has a break in its connections, preventing current from flowing

  • Closed Circuit - an electrical circuit without interruption, providing a continuous path through which a current can flow.

  • Short Circuit - an electrical circuit that allows an electric current to travel along an unintended path with little to no electrical resistance.

There are two fundamental ways a circuit’s components can be connected - Series and Parallel.

  • Series Circuit - a circuit configuration where the components are connected in a single loop, one after another. The current only has one path to follow. If any one component breaks or is removed, then the current flow will stop.

  • Parallel Circuit - a circuit configuration where the components are connected in separate branches. The current has multiple paths to follow. If any one component breaks or is removed, then the current can still flow through the other branches.

Did you know?

  • Electricity was first discovered in 600BC

  • LED Lightbulbs use 80% less electricity compared to conventional lightbulbs


Design Challenge:

Become an artist and design a card for your family or friends by building a paper LED circuit.

  • Decorate the card! Use the LED as inspiration and the centerpiece of your art design.

  • In your circuit, what was the source of voltage, conductive path, and resistor?

  • Try creating another card with two LEDs. How did your design change?

Materials:

  • 1 - Card Stock Paper

  • 1 - Circuit Template

  • 1 - 3V Battery

  • 1 - Strip of Copper Tape

  • 1 - LED Light

  • Markers

  • Scissors

  • Scotch Tape


Build Instructions:

  1. Fold your Card Stock Paper in half to make a card.

  2. Using the Circuit Template, draw the circuit shown on the inside of the card. (See Figure 1)

  3. Using the copper tape, put the tape along the lines on the circuit that you just drew. (See Figure 2)

  4. Take the positive end of the battery (you will see a plus mark on one side of the battery) and stick some copper tape to it. Then stick the battery onto the circuit drawn on your card where it is labeled “Battery”. (See Figure 2)

  5. Next, add the led light. Connect the positive end of the LED (this is the longer leg) to the positive of the battery and the negative end of the LED (this is the shorter leg) to the negative of the battery. The template drawing has a marking on how the LED should be placed as well. (See Figure 3)

  6. Once you place the LED on the copper tape, put scotch tape on top to stick it in place. (See Figure 3)

  7. Fold along the dotted line on the bottom right corner and press on the battery - you will see the circuit light up.

  8. Once the circuit is complete, fold the card in half so that the circuit is on the inside. Using scissors, add a hole in the front of the card so that the LED can come through the front.

  9. Congratulations! Your card is now complete and ready to decorate!

Figure 1

Figure 2

Figure 3

Figure 4

Build instructions provided by Instructables.


Submit Your STEAM Kit Build Feedback:

After you complete your STEAM Kit Build, complete the feedback survey to be entered into a quarterly raffle!


Build a Hovercraft

Hovercraft can glide over a smooth surface by hovering on a cushion of pressurized air. They have engines that power fans which produce a large volume of air underneath the hovercraft to lift it off the ground. This lift is caused because of the pressure difference between the higher-pressure air below the hovercraft’s hull and the lower-pressure air above it. To move the hovercraft forward, the engine also creates thrust (forward motion) by producing an air current which pushes it forward.

Hovercrafts can travel over land, water, mud, ice, and other various surfaces. As a result, they are considered amphibious vehicles because they can travel over both land and water. Because of this versatility, hovercrafts are often used for rescue, commercial, and military applications.

Did you know?

  • Dr. Christopher Cockerell is credited with inventing and patenting the hovercraft in 1956. His idea came from an experiment of using air to lift kitchen supplies.

  • In 1995, according to Guinness World Records, Bob Windt achieved the fastest speed in a hovercraft with a top speed of just over 85 mph.


Design Challenge:

Become a mechanical engineer to design and build a hovercraft to help transport supplies.

  • How does the air from the balloon impact the hovercraft’s speed?

  • Decorate your hovercraft using the markers and stickers.

Materials:

  • 1 - Balloon

  • 1 - Bottle pop top

  • 1 - CD

  • Glue

  • Markers

  • Stickers


Build Instructions:

  1. Use the markers and stickers to decorate your hovercraft!

  2. Glue the bottle pop top to the center of a CD. Push the top down to close. (See Figure 1)

  3. Blow up the balloon and twist it closed. (See Figure 2)

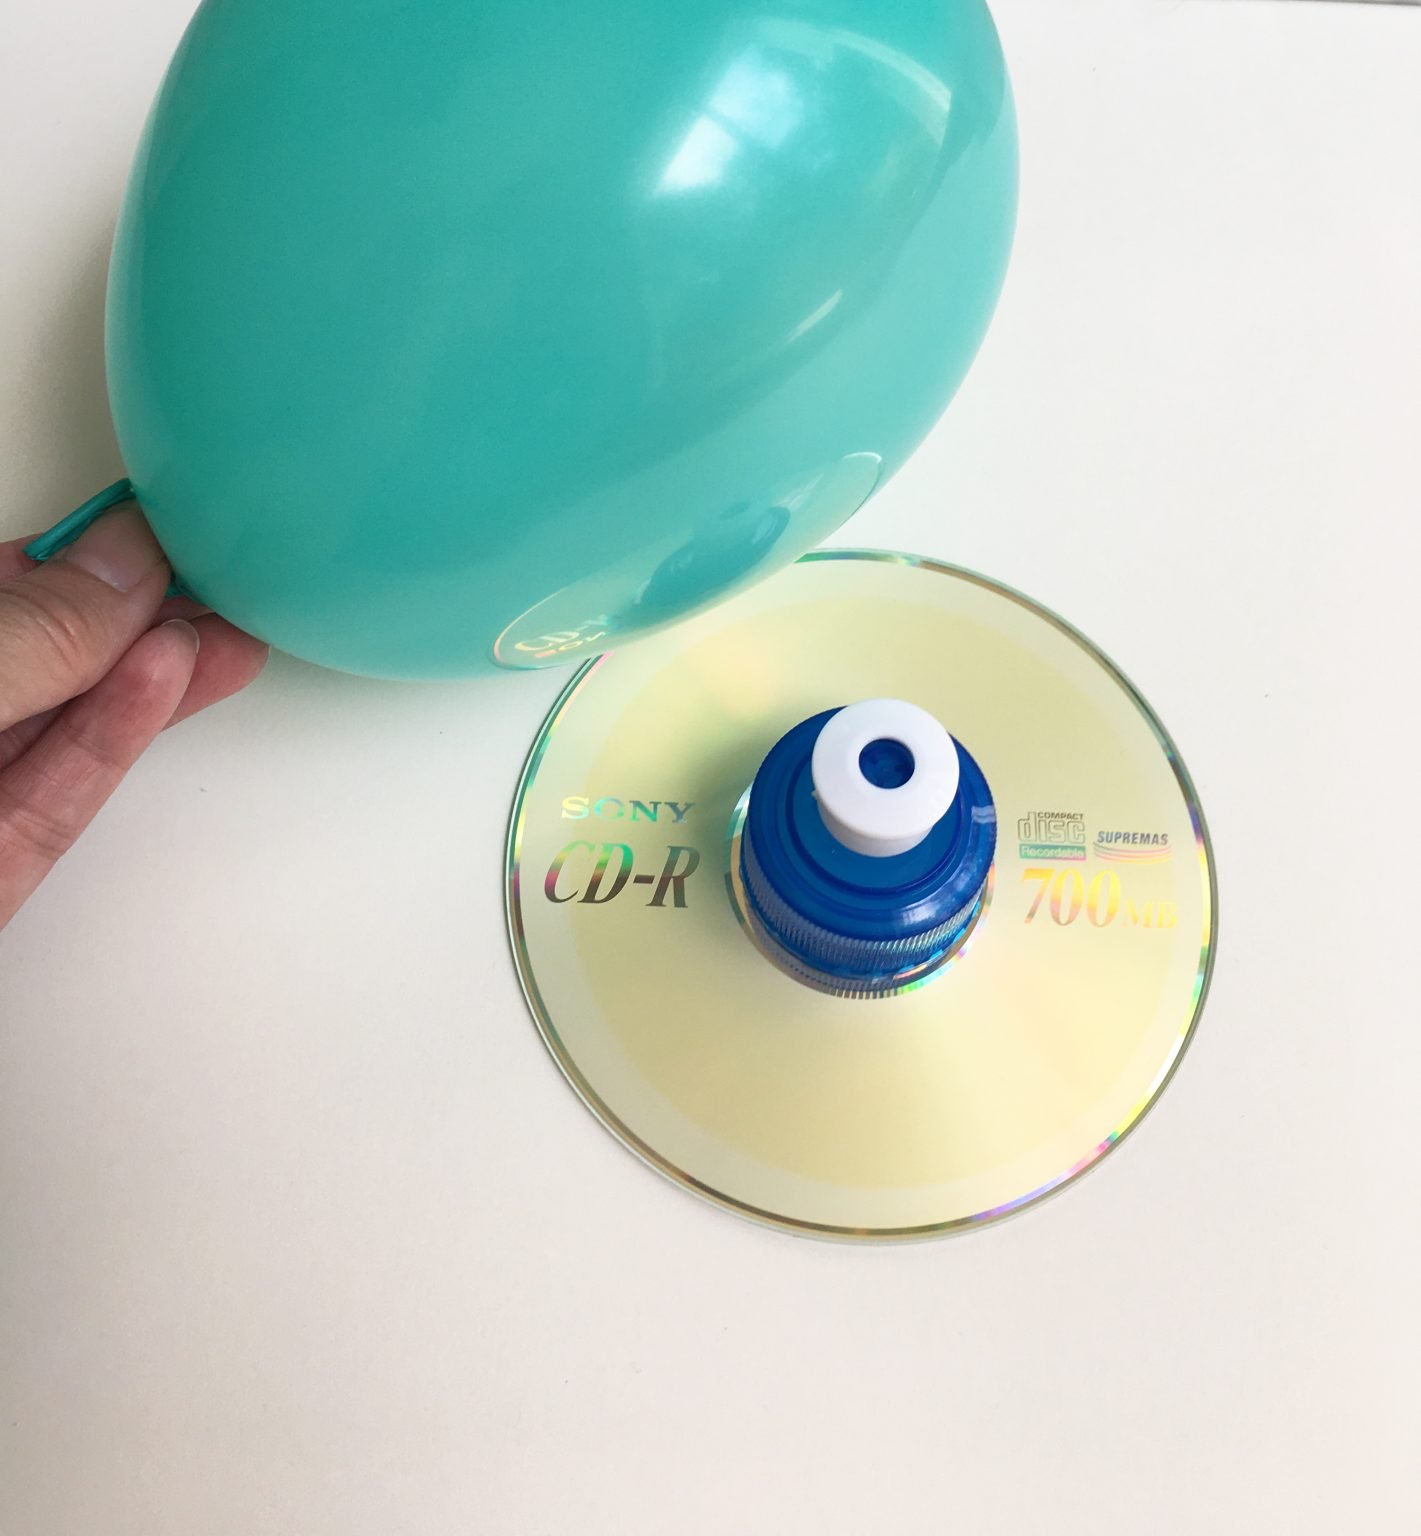
  4. Carefully keeping the balloon twisted, stretch the end over the pop-top. (See Figure 3)

  5. Now pop open the top and watch your hovercraft travel! Use a smooth surface like a floor or countertop. (See Figure 4)

  6. Try experimenting with how much you open and close the bottle pop top. Does it impact how far your hovercraft travels?

Figure 1

Figure 2

Figure 3

Figure 4

Build instructions provided by Little Bins for Little Hands.


Submit Your STEAM Kit Build Feedback:

After you complete your STEAM Kit Build, complete the feedback survey to be entered into a quarterly raffle!