STEAM Ahead - The Human Body & Air Pollution STEAM Kits

STEAM KIT INTRODUCTION: 

This STEAM kit is designed to introduce students to the science of the human body and the impact of air pollution on the health of people, animals and plants. The kit includes the materials to complete three activities: Create a DNA Model, Create a Lung Model, and Build an Air Pollution Catcher.

Select your activity below for instructions and additional information:


unsplash-image-LiNIONbajm4.jpg

Create a DNA Model

DNA is a short nickname for deoxyribonucleic (say: dee-OK-see-ri-bo-new-klee-ik) acid. It carries all of the information about how a living thing will look and function. Think of it like a set of instructions inside your body’s cells that tells it how to build you!

DNA looks like a twisting ladder and is made up of four chemical bases called nucleotides (say: NEW-klee-uh-tydes) - adenine (A), guanine (G), cytosine (C), and thymine (T). These bases pair up with each other to form base pairs — A with T and C with G.

Genes are made up of DNA. Genes determine your traits which are features and characteristics about you. For example what color your hair and eyes are and how tall or short you are. You get half your genes from your mom and half from your dad, which is why you might look similar to them. 

Did you know?

  • Human beings may look different, but 99.9% of our DNA is the same

  • If one person's DNA was unraveled and placed end to end, it would stretch from Pluto and back.

  • Your DNA is 50% the same as a cabbage


Design Challenge:

Become a Microbiologist by creating a DNA model to explore the structure of DNA and how it works.

  • What does DNA do?

  • What is the shape of DNA?

  • What are the four bases in DNA?

  • What are the DNA base-pairing rules?

Materials included in kit:

  • Construction Paper

  • Lab Notebook

  • Markers & Pencil

  • Pipe cleaners (5 different colors, 2 of each color)

  • Scissors


Build Instructions:

Build instructions provided by Pale Blue Marbles

Prepare your materials

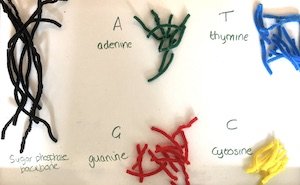
Figure 1: Four Piles of bases with labels.

  1. Choose a color for your DNA backbone (we chose black)

  2. Choose four colors for your DNA bases (we chose blue, green, red and yellow)

  3. Set aside the pipe cleaners for the backbone

  4. Cut the pipe cleaners for your bases into segments around 5 cm long

  5. On your construction paper, make four piles of bases and add a label to each: adenine, guanine, cytosine, thymine (or you can use A, G, C, T) - See Figure 1

Build the first strand of DNA

Figure 2: Backbone pipe cleaner with bases twisted on.

  1. Take one of the DNA backbone pipe cleaners and twist the bases (in any order) onto it at regular intervals. - See Figure 2

    • If you want a longer molecule, twist additional backbone strands together and continue twisting bases onto the backbone.

Build the second DNA strand

Figure 3: Use the DNA base-pairing rules to create the second backbone strand.

  1. Remember the DNA base-pairing rules:

    • A= T AND G =C

  2. Take another backbone pipe cleaner and twist bases onto the second strand, using the first strand as a guide and following the base-pairing rules. - See Figure 3.

  • For example, if you made the first strand with A-C-G-T-T-A you would need the second strand to have T-G-C-A-A-T.

Make a double helix

Figure 4: Join the bases-pairs together.

  1. Once you have completed the second strand, you can zip up the DNA by twisting the base pairs together - See Figure 4.

  2. You can make a right-handed double helix by twisting the backbone: holding the top with your left hand and the bottom with your right, twist your right hand to the right and your left hand to the left.

  3. Build a DNA model complete! 


Submit Your STEAM Kit Build Feedback:

After you complete your STEAM Kit Build, complete the feedback survey to be entered into a quarterly raffle!

 
unsplash-image-Pw9aFhc92P8.jpg

Create a Lung Model

Your lungs are very important organs because they allow you to breathe! When you breathe in, oxygen comes into your body. When you breathe out, carbon dioxide goes out. This exchange of oxygen and carbon dioxide is called respiration! It happens 12 to 20 times per minute. 

Your respiratory system is the group of organs that cause you to breathe. It is made up of 7 important body parts: nose, mouth, throat, voice box, windpipe, lungs, and diaphragm.

Your lungs are a pair of cone-shaped organs made up of spongy, pinkish-gray tissue. They have many tubes (which look like tree branches) called bronchi (say: BRAHN-kye) and bronchioles (say: BRAHN-kee-olz) which carry the air throughout your lungs. In addition to helping you breathe, your lungs do many things such as:

  • Support your sense of smell

  • Allow you to speak and create sound

  • Protect your body from bad substances, dust, and germs

It is very important that you keep your lungs healthy because they impact your body! You can keep your lungs healthy by:

  • Not smoking and vaping

  • Exercising

  • Eating healthy

  • Drinking lots of water

  • Avoiding air pollution

Did you know?

  • Lungs are the only organs that can float on water

  • You have two lungs but your left lung is a little smaller than your right lung because the left side needs extra room for your heart.

  • You take 20,000 breaths each day.


Design Challenge:

Become a Pulmonologist by creating a lung model to explore healthy and unhealthy lungs.

  • What body parts make up your respiratory system?

  • How do your lungs work?

  • What happens if air cannot get into your lungs?

  • What happens if your lung has a hole in it?

  • How can you keep your lungs healthy?

Materials included in kit:

  • 4 - Brown Paper Bags

  • Markers

  • Masking Tape

  • Scissors

  • 4 - Straws

  • Templates - Lungs, Nose & Mouth


Build Instructions:

Build instructions provided by Human Body Learning.

Part 1: Create a Healthy Lung Model

  1. Cut out a nose and mouth from the template.

  2. Put two straws together to make an upside-down “Y” shape. Tape the long part of the straws together. (See Figure 1)

  3. Tape the nose and mouth to the straws. (See Figure 2)

    • This is where air first enters the human body. Doctors call this area the “upper airway” or the “upper respiratory tract.”

  4. Draw bronchioles and alveoli with a marker on the brown paper bags “lungs.” (See Figure 3)

    • Your lungs have lots of little bronchioles and alveoli. Bronchioles are the smallest airways in the respiratory system. Alveoli are the small bags of air at the end of each bronchiole. Doctors call this area the “lower airways” or the “lower respiratory tract.”

  5. Tape a brown paper bag around each straw end. The paper bags are the lungs of your model. (See Figure 4)

    • Make sure there are no gaps for air to leak out!

  6. Experiment! Blow slowly into the straws. What do you see? Are you able to blow air into the paper bag lungs?

    • Notice how both lungs fill up with air. Because the straw “airways” are open, the lungs can breathe in fresh air.

  7. Now try squeezing the air out of the paper bag lungs. What do you notice? Did the paper bag lungs get smaller? Did you feel the air rush out of the open end of the straws?

Figure 1: Tape straws together in upside-down “Y” shape.

Figure 2: Tape the nose and mouth to the straws

Figure 3: Draw bronchioles and alveoli

Figure 4: Tape a brown paper bag around each straw end


Part 2: make a blocked windpipe (trachea)

  1. With your fingers, squeeze the straws under the mouth in the “trachea” part of the lung model.

  2. Now, try blowing air through the straws.

    • What do you notice? Are you able to blow air into the lungs?

    • How do you think someone would feel if their trachea was blocked?


Part 3: Create an unHealthy Lung Model

Figure 5: Cover the end of a straw with tape to block the airway

  1. Repeat steps 1 through 4 described above in the Part 1: Create a Healthy Lung Model section

  2. Then, cover the end of a straw with tape to block the hole. (See Figure 5)

  3. Tape a brown paper bag around each straw end. The paper bags are the lungs of your model. Make sure there are no gaps for air to leak out! (See Figure 4)

  4. Experiment! Blow slowly into the straws. What do you notice? Are you able to blow air into both lungs or only one lung?

    • When the straw “airways” are blocked, the lungs cannot breathe fresh air. In real life, when airways are blocked, a person would have trouble breathing.


Part 4: Create an Lung With Hole Model

  1. Cut a small hole in the brown paper bag of your lung model. See what happens when you try to blow air in and suck air out.

    • Sometimes, the lung can get a hole when the chest gets hit or poked with a lot of force. This can be very painful! When a person has a hole in a lung, doctors call this a “pneumothorax” because air from the lungs can leak out into the chest. “Pneumo” means “air,” and “thorax” means” chest.


Submit Your STEAM Kit Build Feedback:

After you complete your STEAM Kit Build, complete the feedback survey to be entered into a quarterly raffle!

 
unsplash-image-SvOolOyZQPc.jpg

Build an Air Pollution Catcher

Air pollution happens because gases, dust, smoke and odor get into the air and make it unclean. Human activities such as cutting of trees, burning of wood, burning of fossil fuels (coal, oil, gas), and smoke released from cars can cause air pollution. Air pollution is bad for humans and animals to breathe and for plants to live in. In humans, pollutants (the bad stuff in the air) can get caught in your lungs and make it hard for you to breathe and also damage your lungs. That is why it is very important that we take action to help reduce air pollution!

Air pollution can cause climate change. Climate change is the long-term change in temperatures and weather patterns. Climate change causes the Earth to get warmer over time. Its like when you leave a blanket on yourself for too long and you get very hot. Likewise, bad gases from air pollution are released into the air and trap heat from the sun, making Earth too hot. This causes changes in Earth’s weather patterns like more storms, hotter summers and melting ice at the poles. In fact, 2023 was the hottest year on record and 2024 is set to be even hotter!

There are many ways that you can help reduce air pollution and climate change:

  • Turn off lights, TV, and electronics when you are not using them

  • Use your own reusable water bottle instead of plastic water bottles

  • Recycle paper, plastic, glass and other materials

  • Walk, bike or take public transportation whenever possible

  • Share what you’ve learned with your family and friends!

Did you know?

  • Our planet (Earth) is the warmest its been in 800,000 years.

  • Air is mostly gas. It is made up of 78% nitrogen and 21% oxygen

  • The Arctic sea ice is melting at a shocking rate – 9% per decade!


Design Challenge:

Become an Environmental Scientist by building an air pollution catcher and test if your air is “clean” or “dirty.”

  • How do you think the areas you chose to perform the experiment in impacted your results?

  • How do you think the particles in the air affect air quality and our ability to breathe well?

  • Why is reducing air pollution important? What can you do to help reduce air pollution?

Materials included in kit:

  • Disposable Gloves

  • Index Cards with a hole

  • Petroleum jelly (e.g., Vaseline)

  • String or Yarn

  • Magnifying Glass

  • Lab Notebook


Build Instructions:

Build instructions provided by Los Angeles Public Library 

  1. Find 2 - 4 locations in which you can hang the air pollution catchers. You will create a catcher for each location.

    • You can do this in your home or school if you’d like to find out how clean the air in your home/school is, or you can hang one outside in your yard or another area. It also helps to try placing one in a busier area than the other.

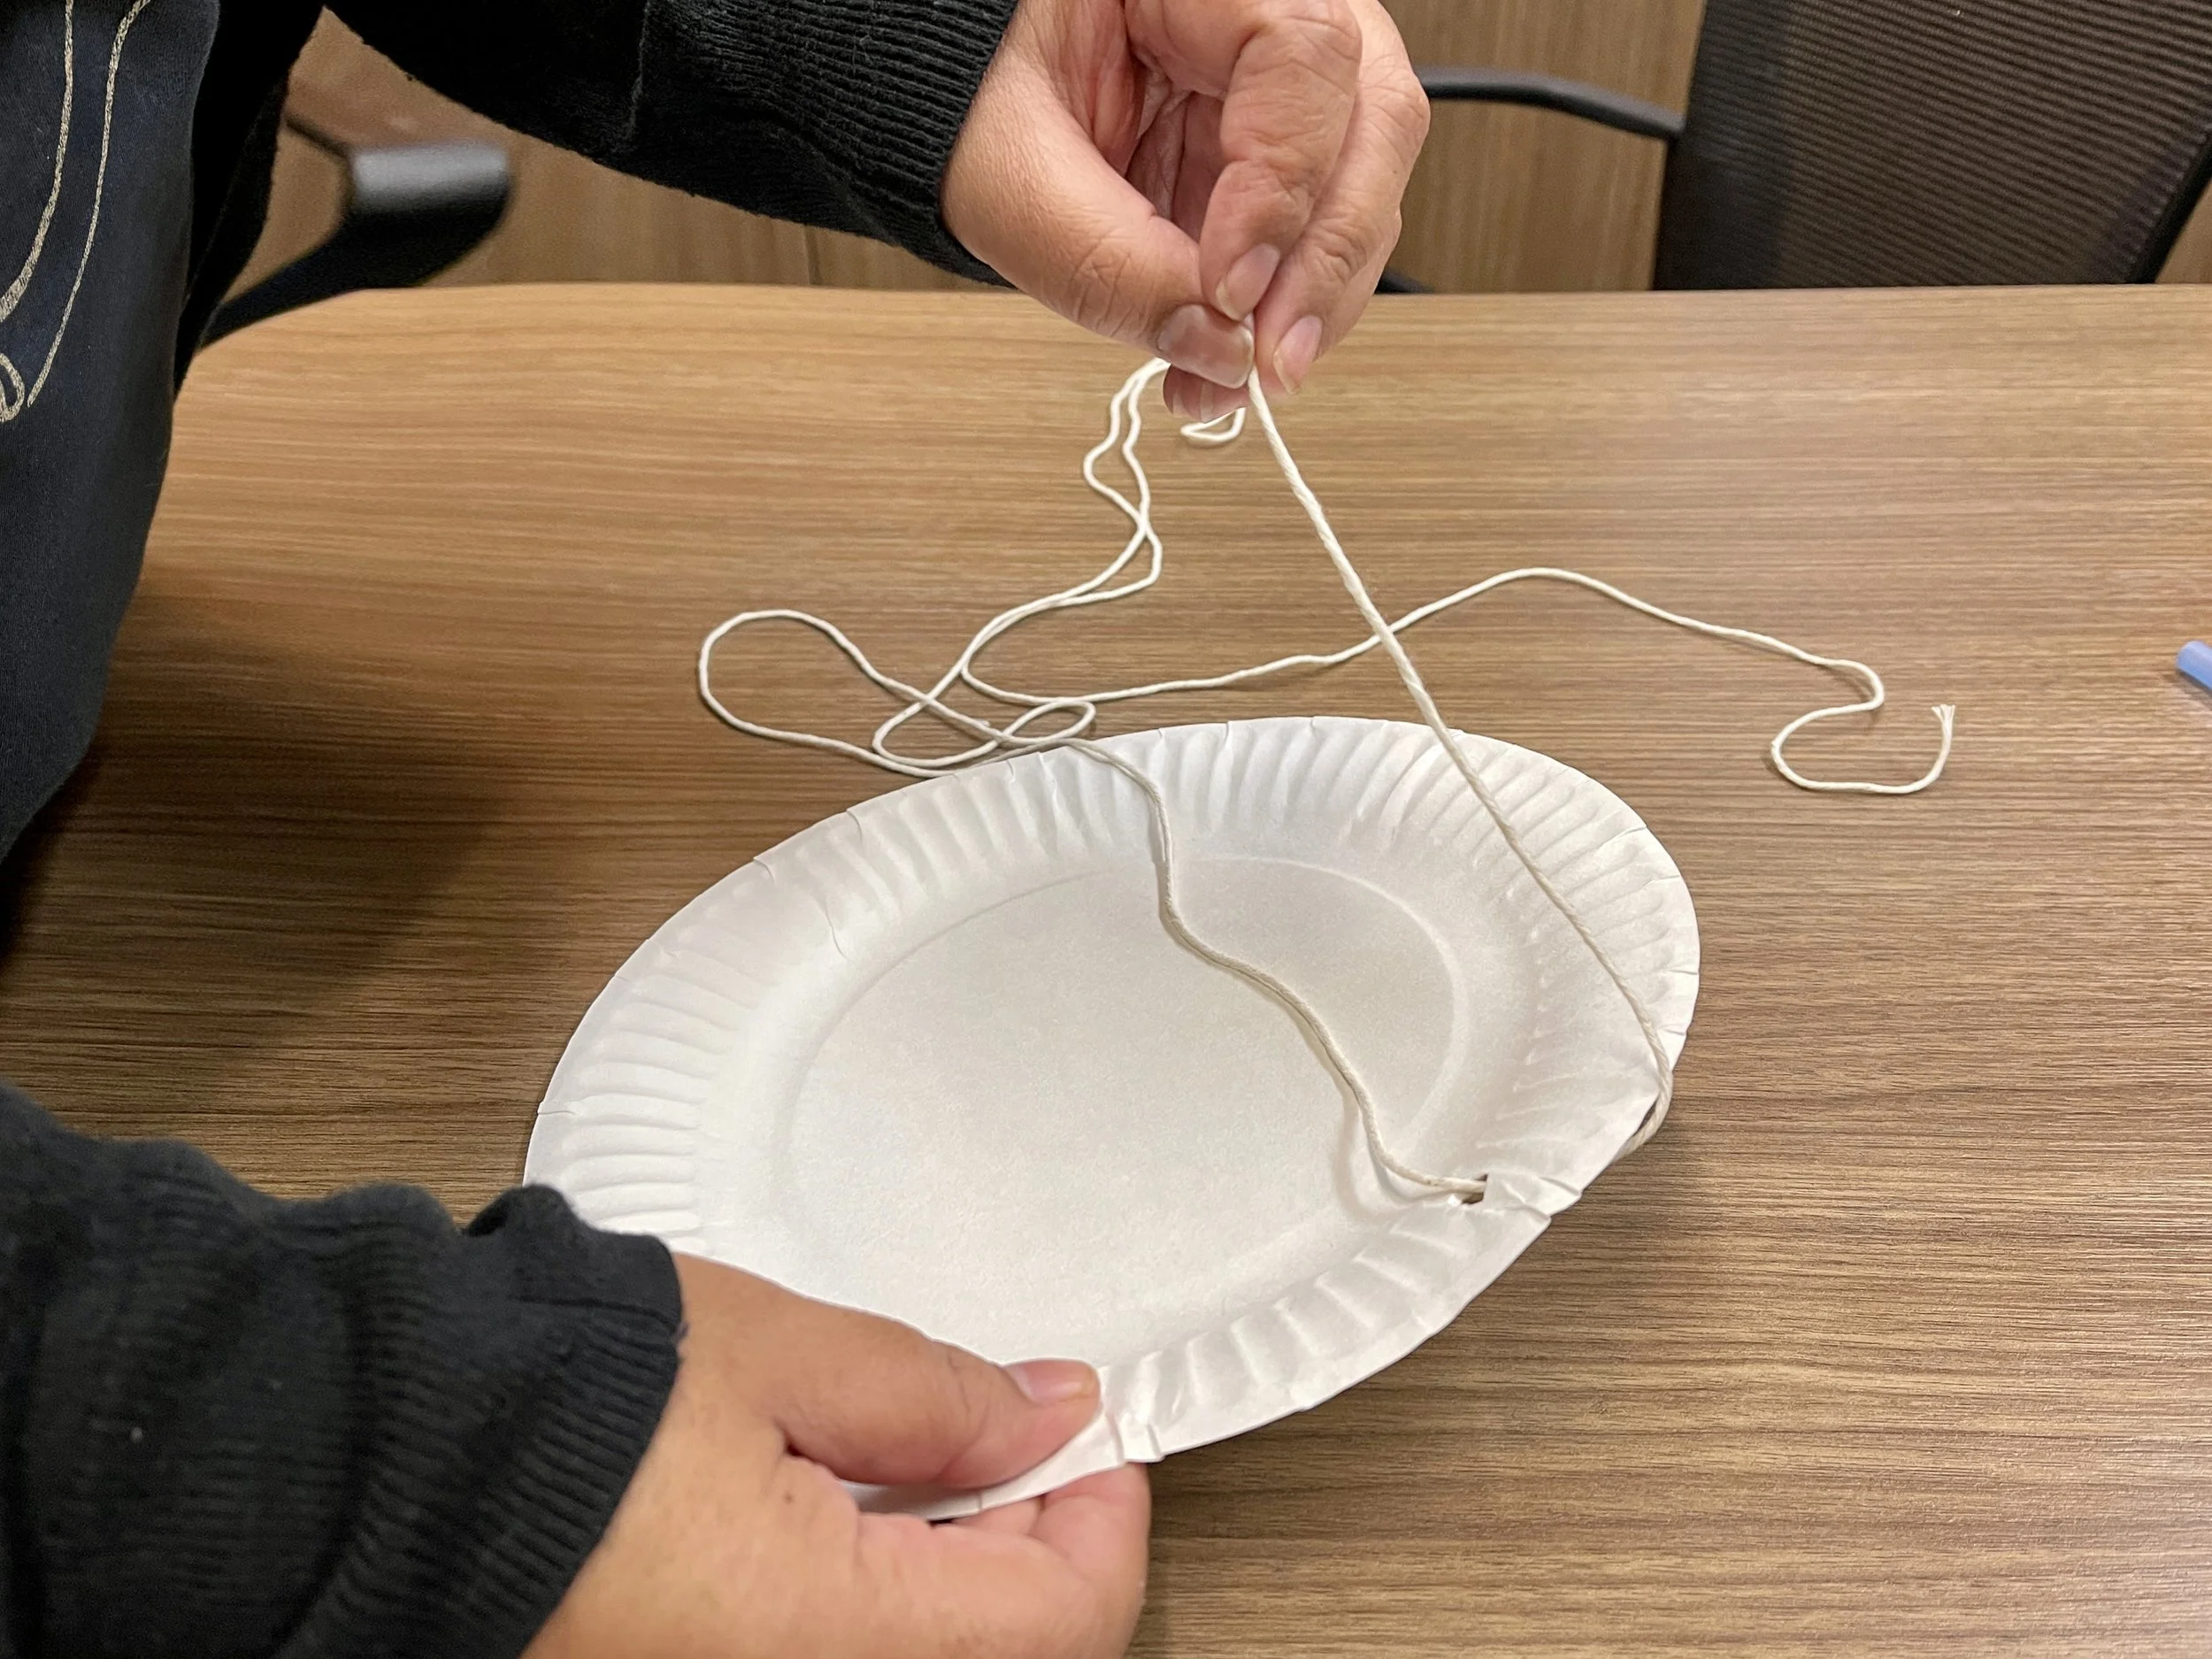
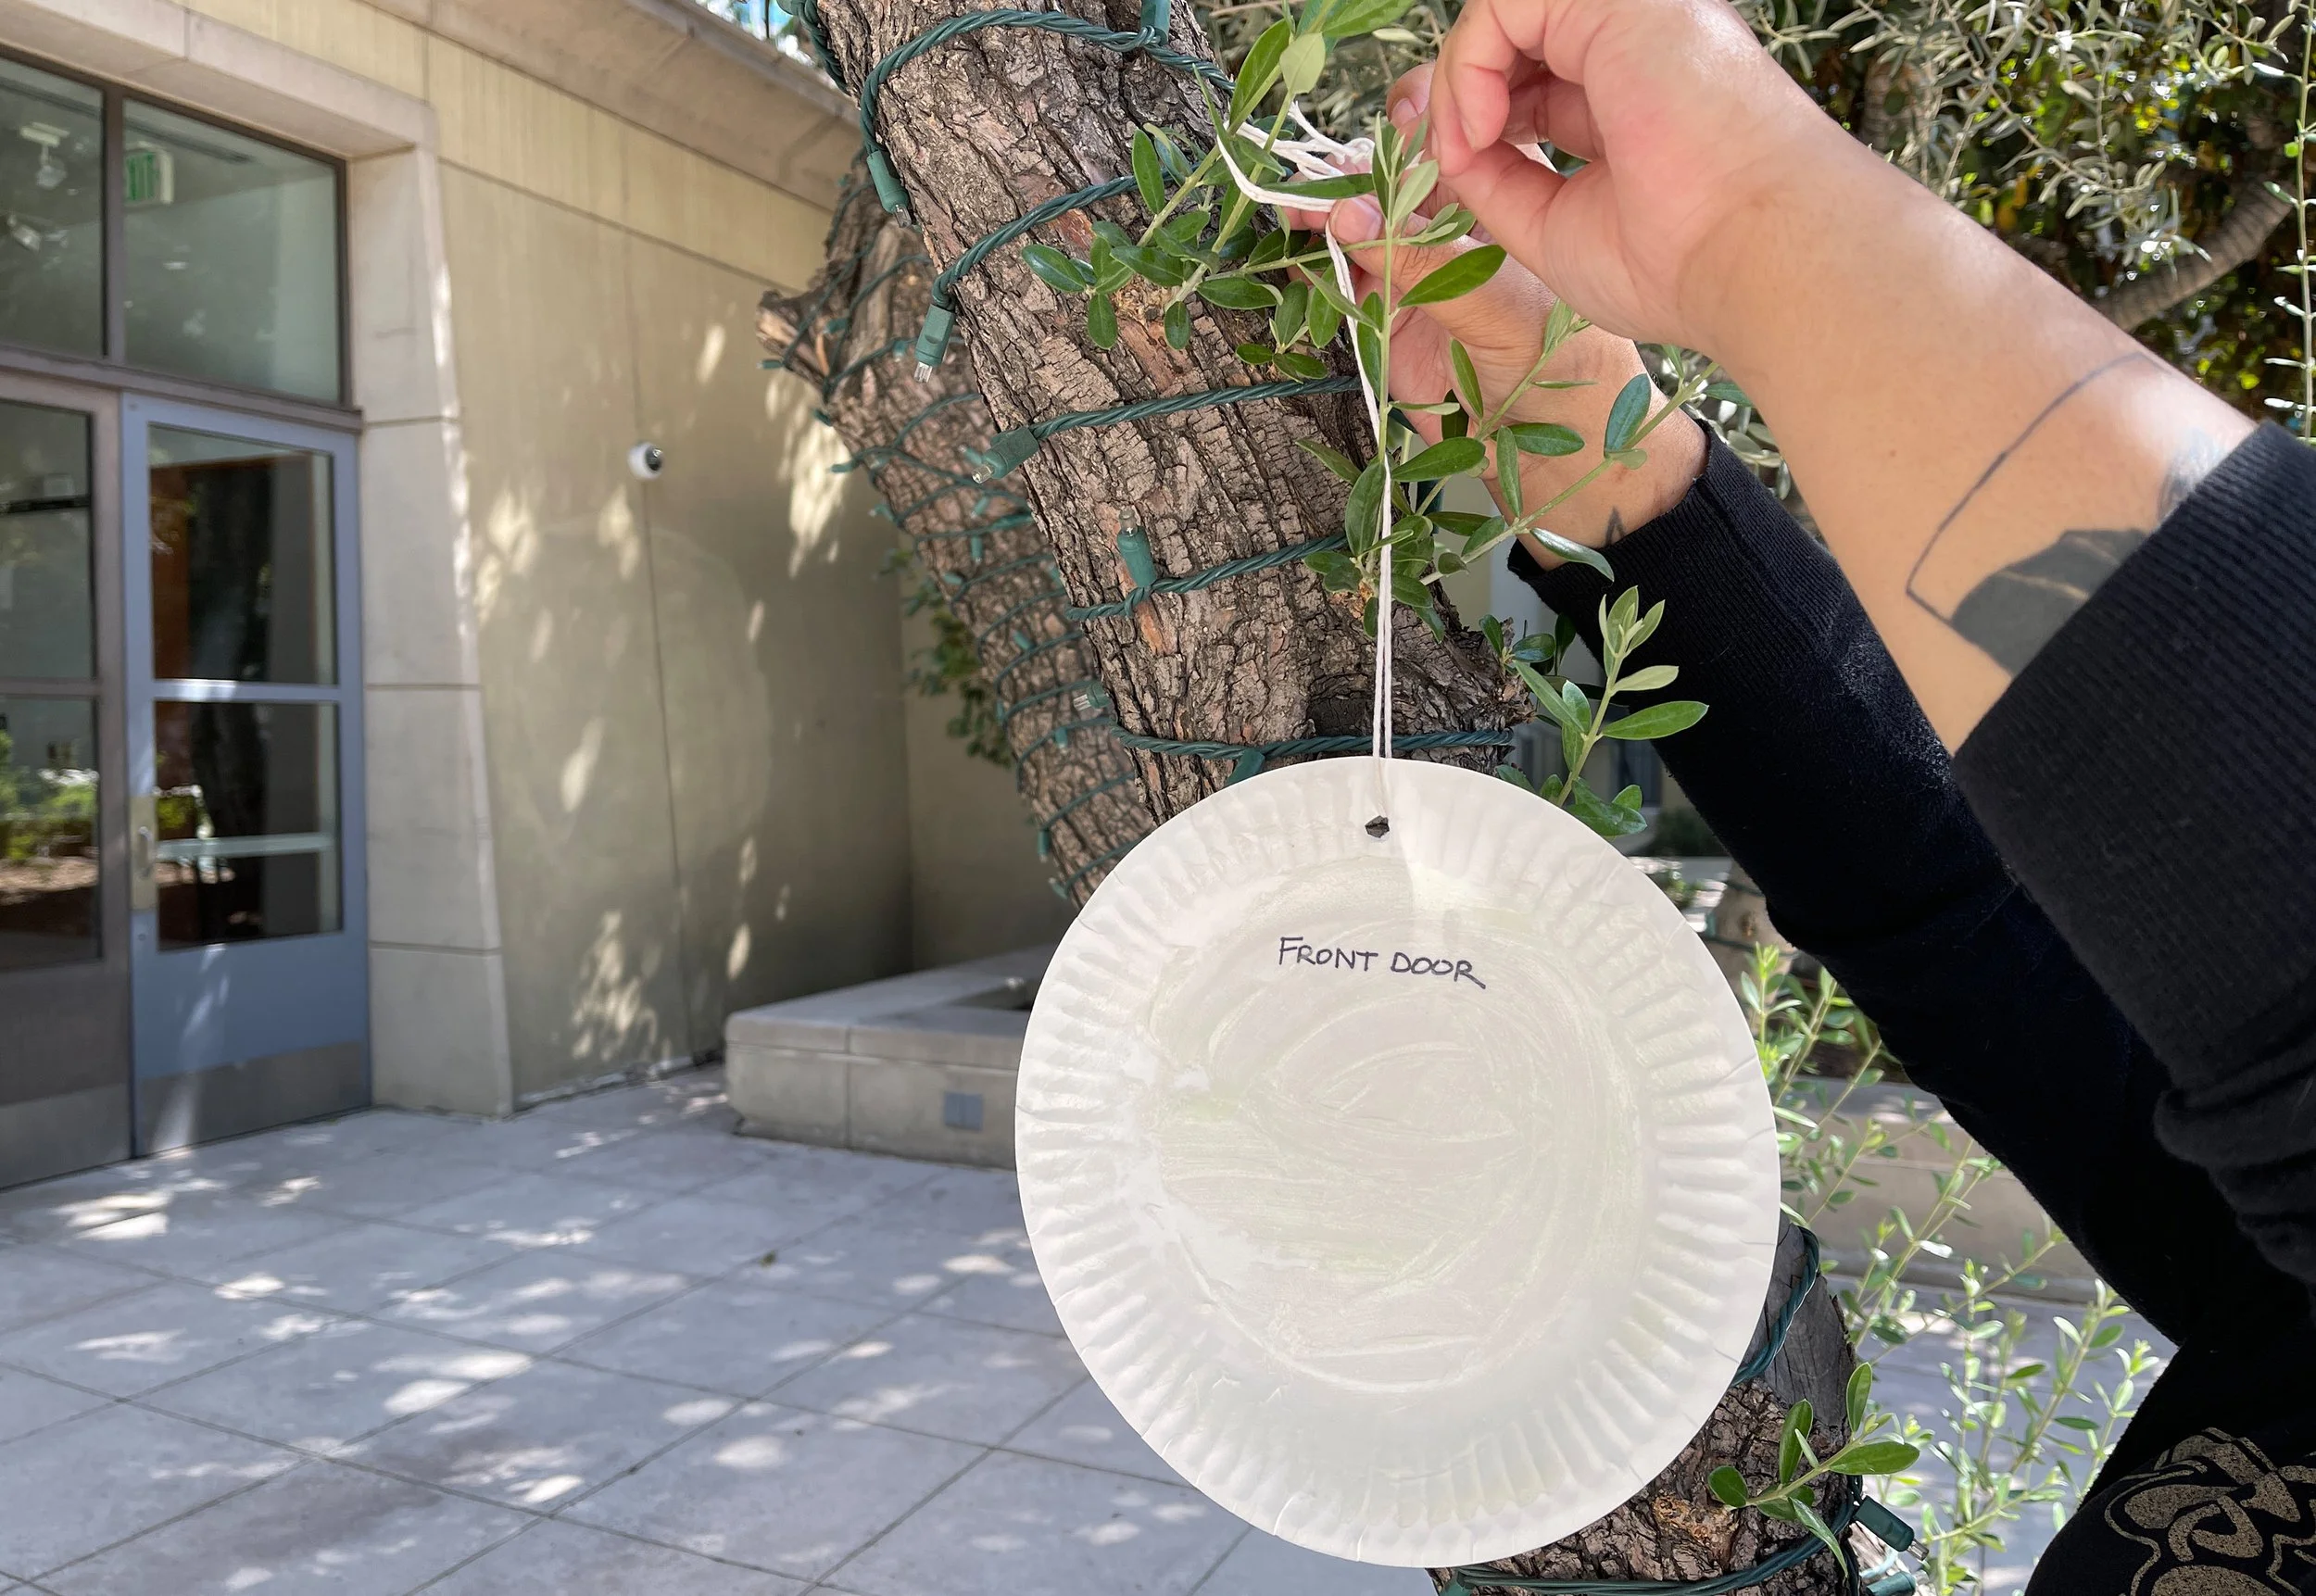
  2. Start with stringing up your catchers for hanging. Pull the string through the hole in your index card (or plate) that has a hole in it. Make sure the string is long enough for where you plan to hang your catcher. (See Figure 1)

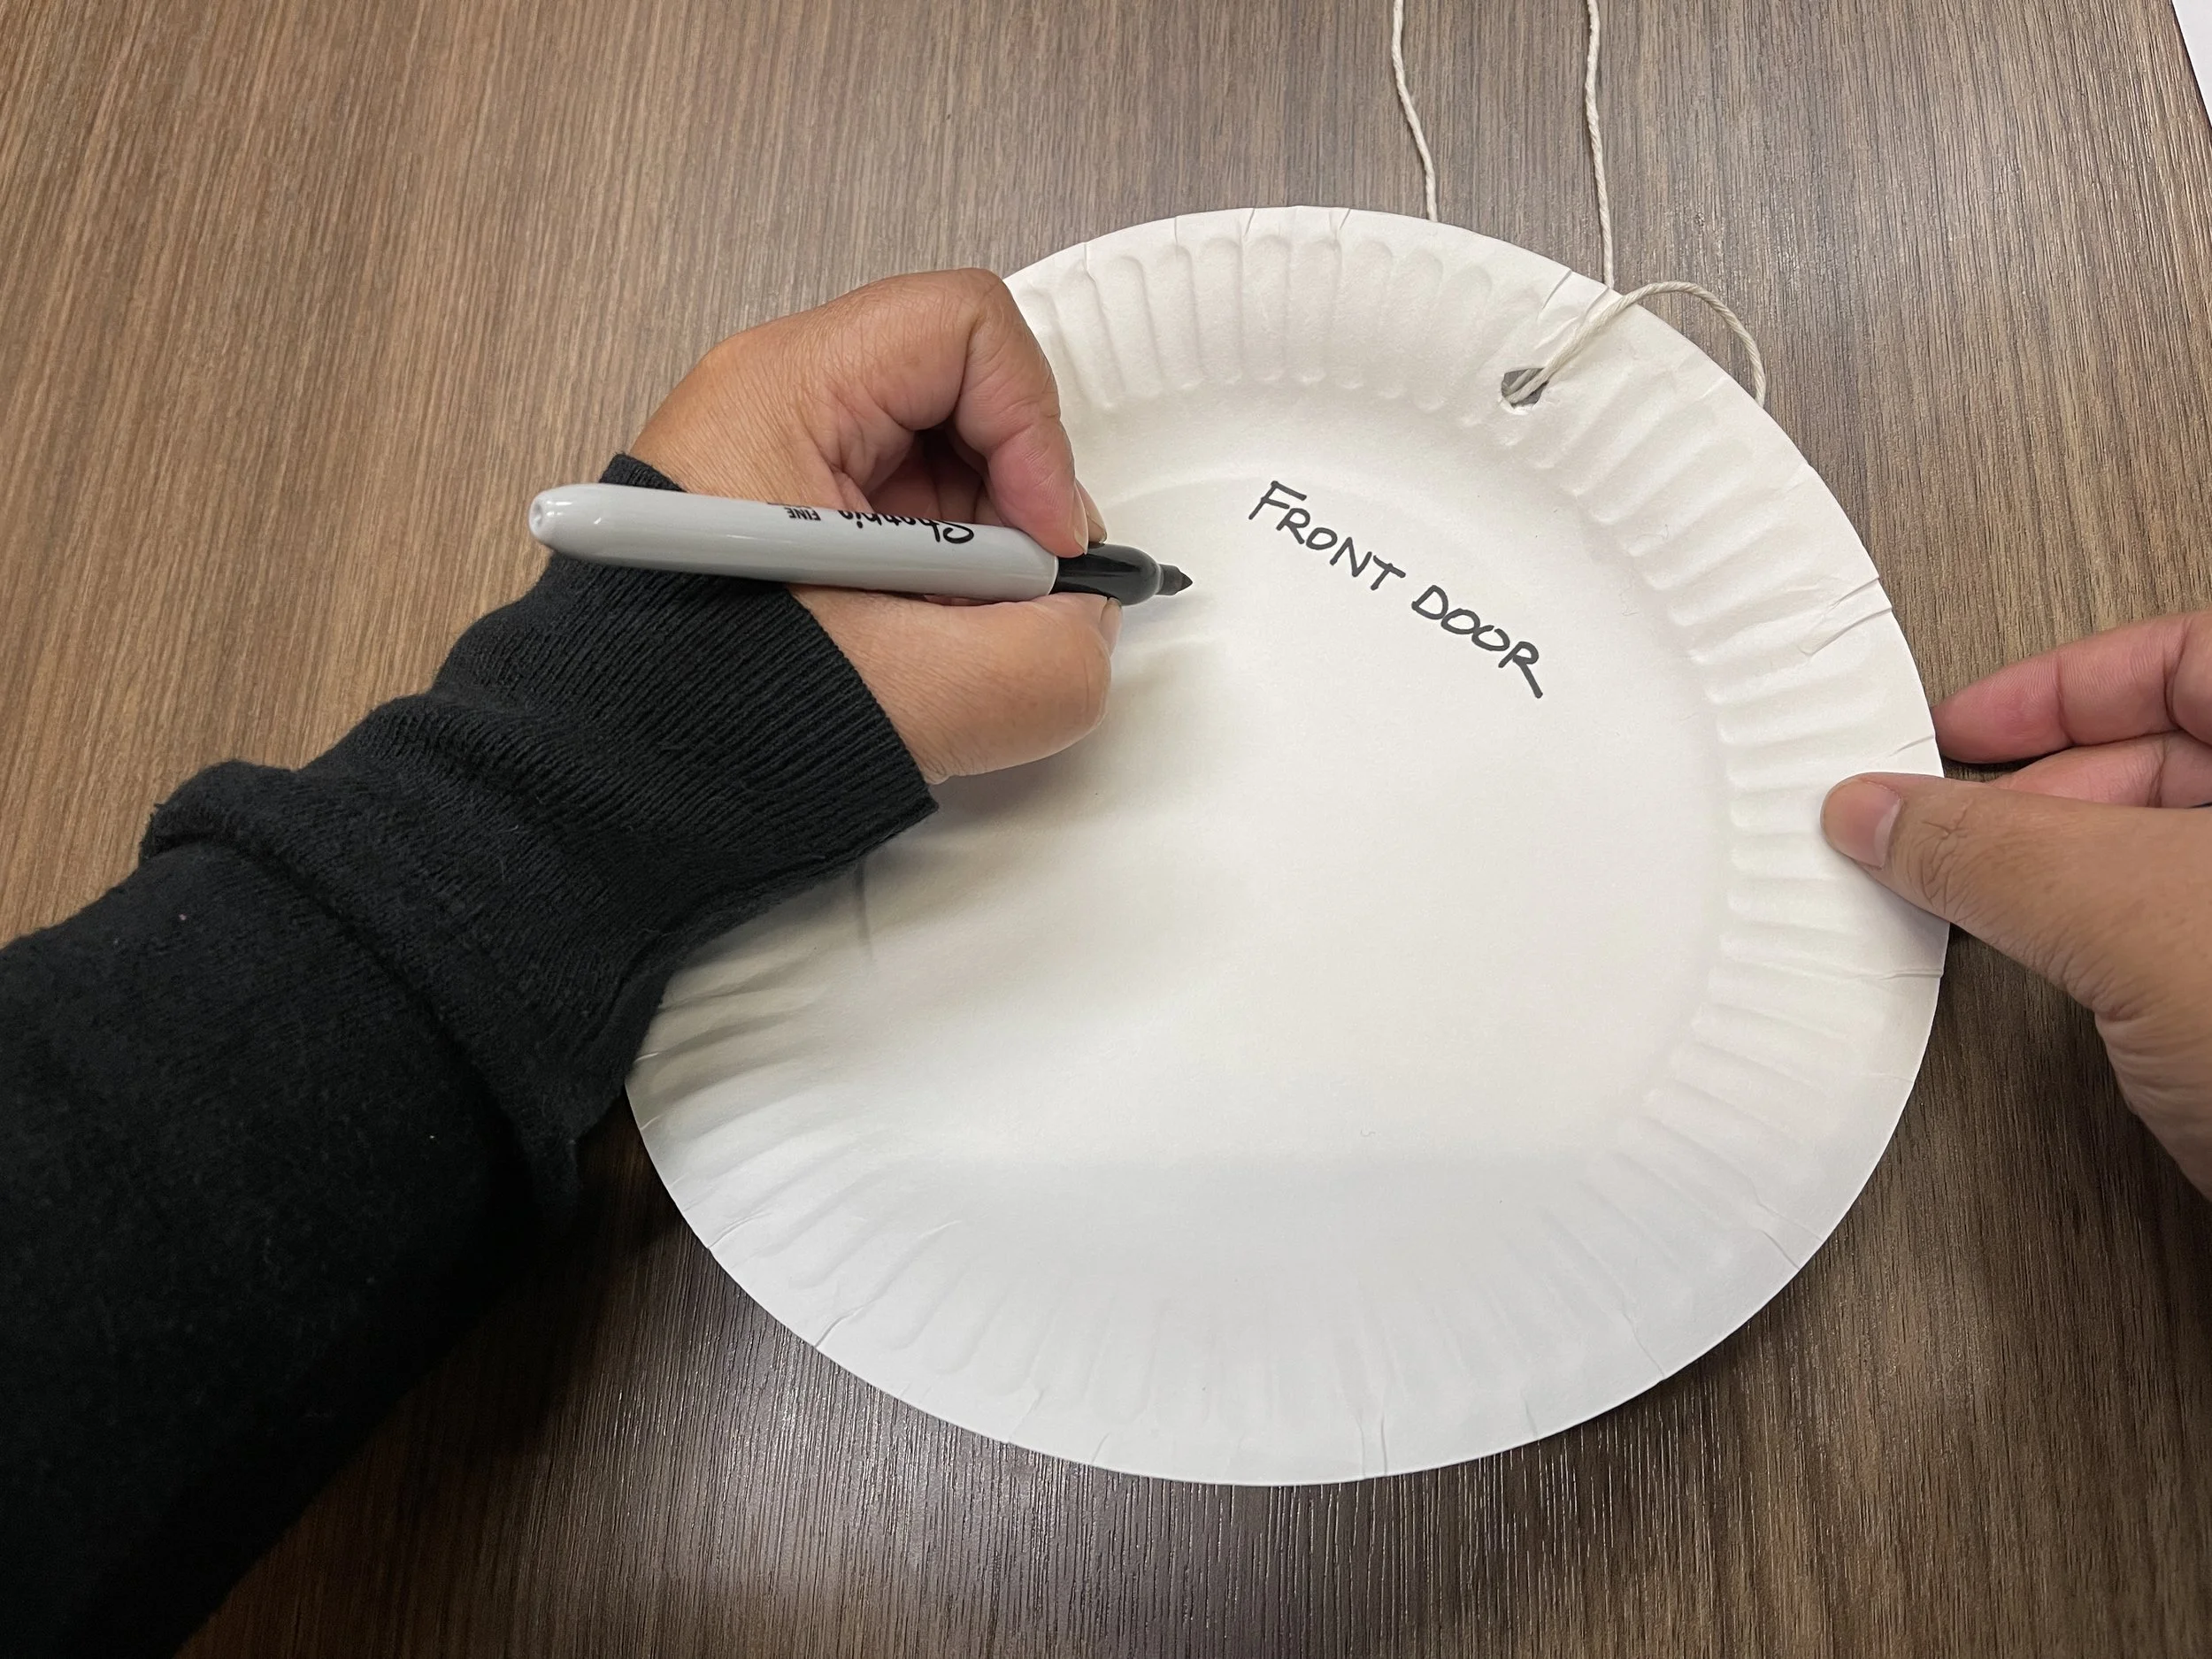
  3. Write on each card the date and location you plan to hang your catcher. It helps you remember the site after taking the cards down to study them. (See Figure 2)

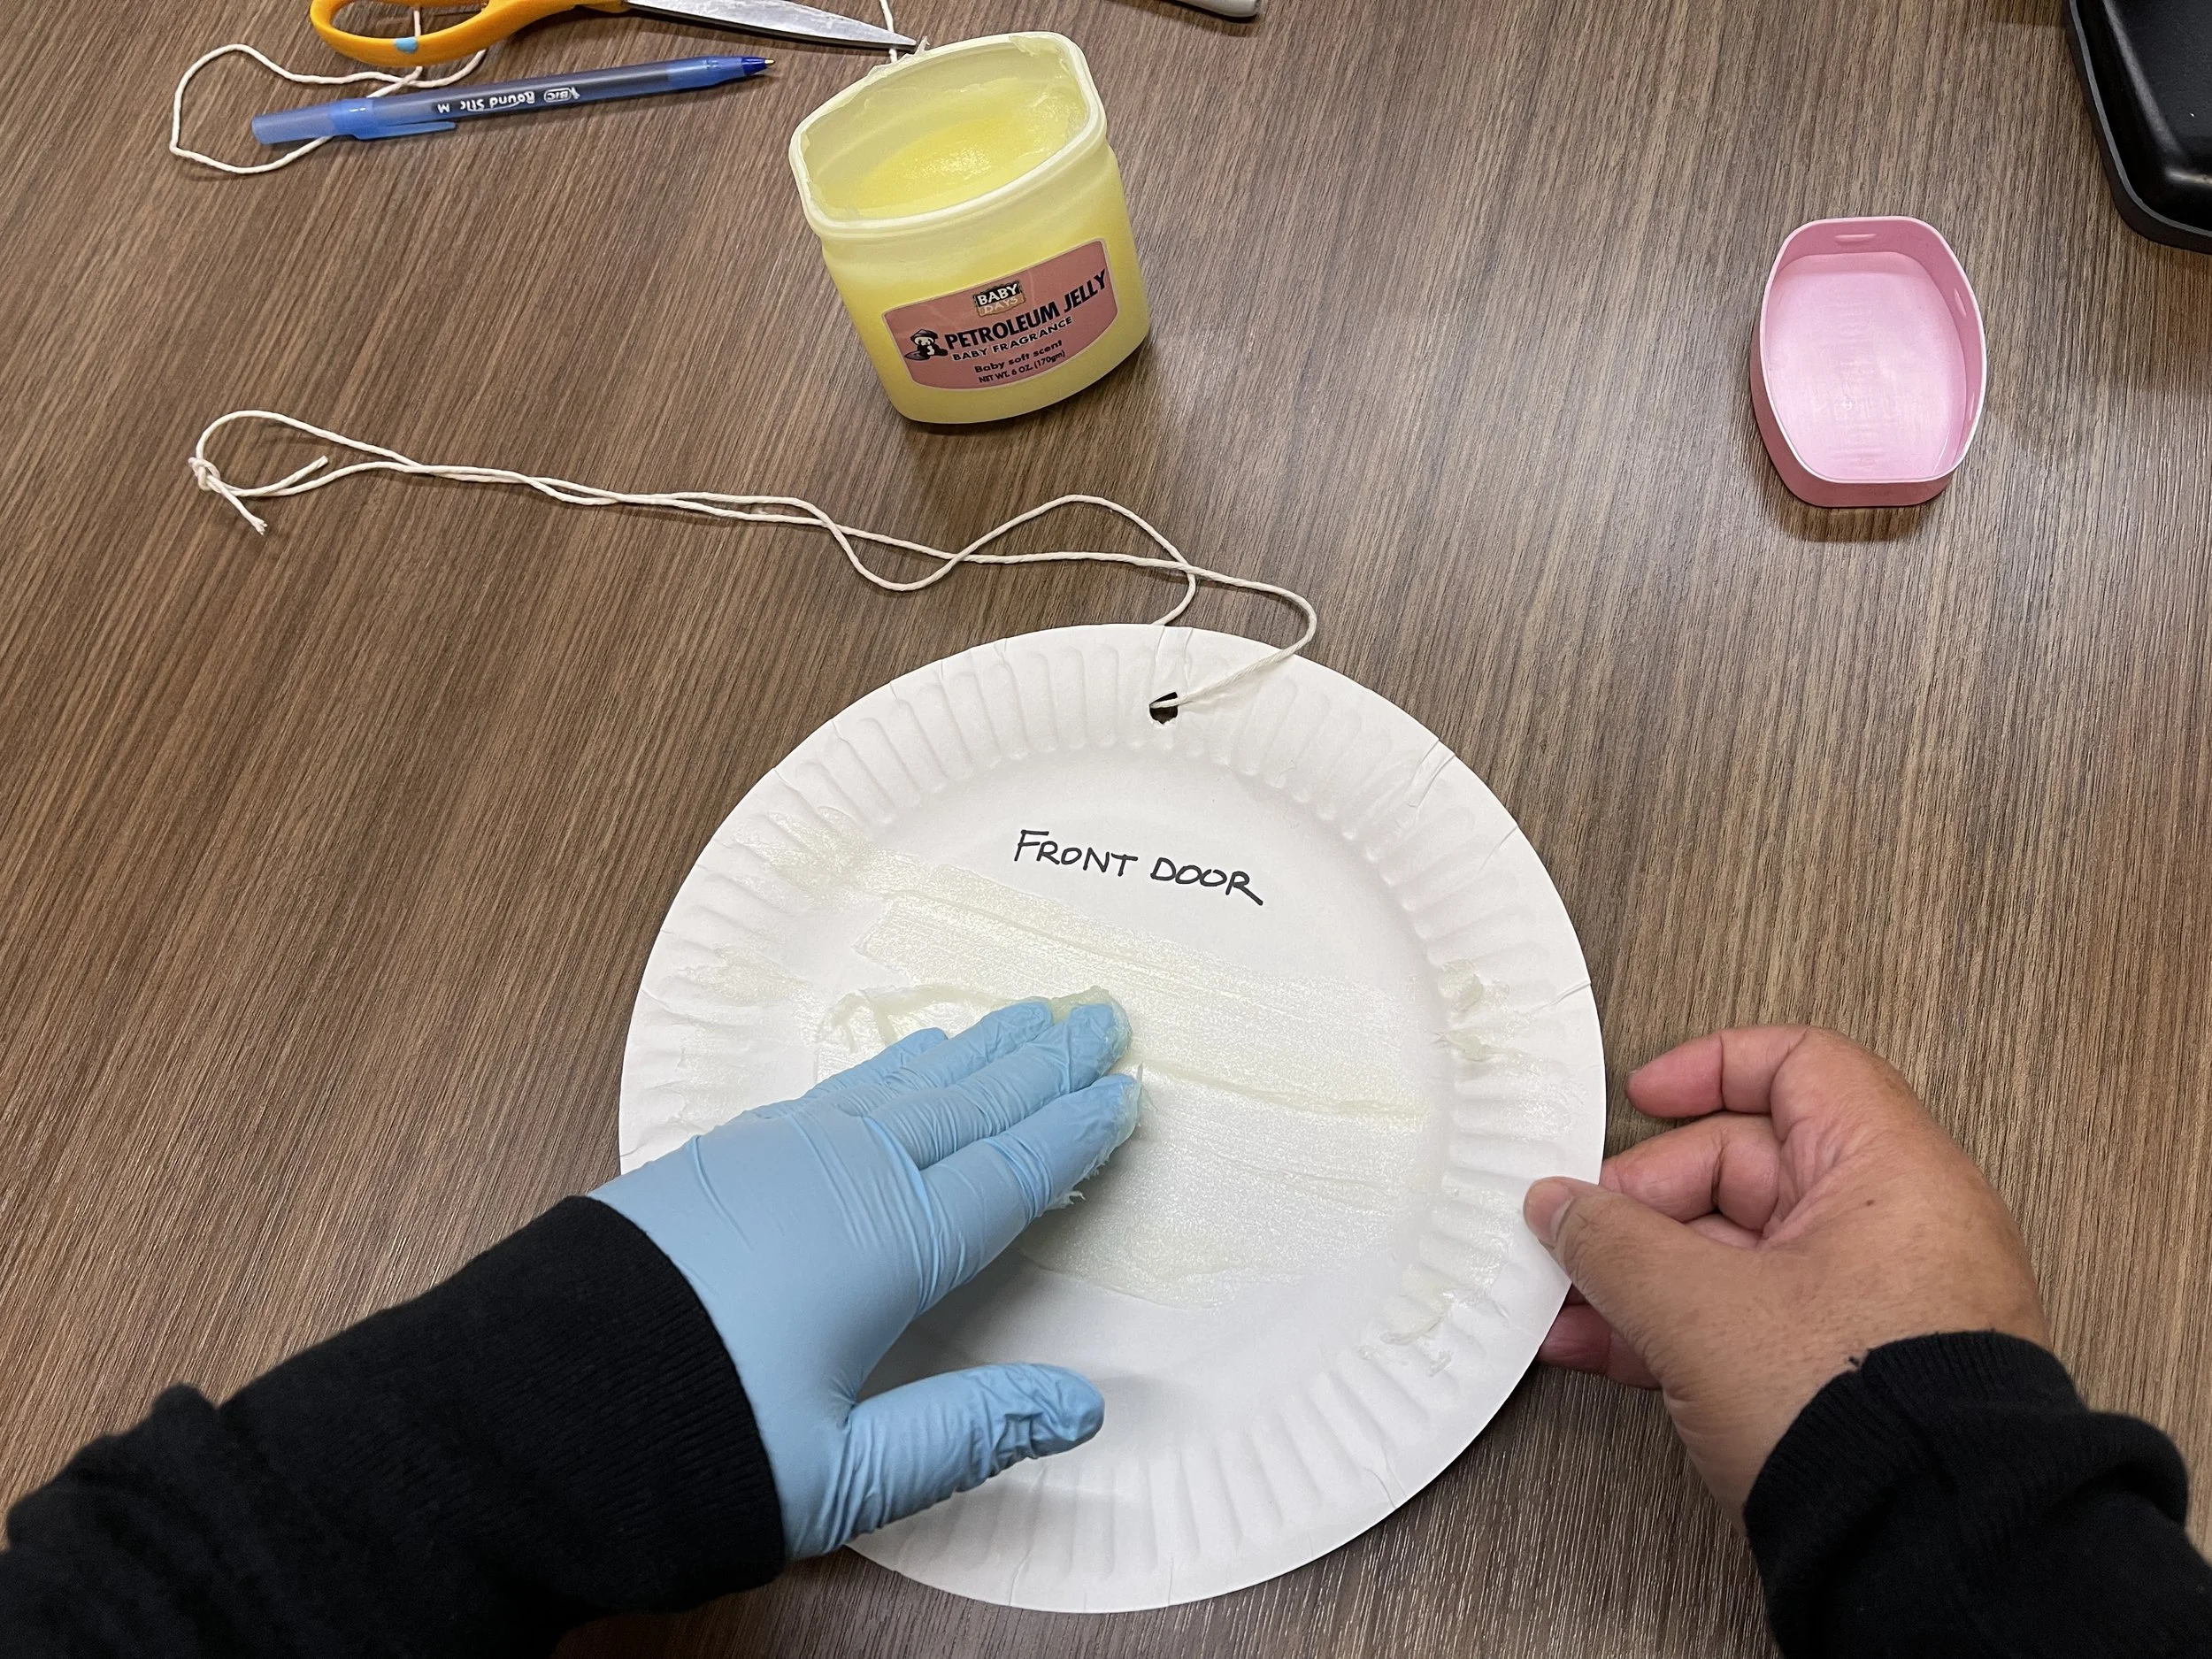
  4. Put on your gloves and carefully apply a thin coat of petroleum jelly to one side of each card/plate. (See Figure 3)

  5. Hang the cards/plates in different places within the areas you’ve chosen in step 1. (See Figure 4)

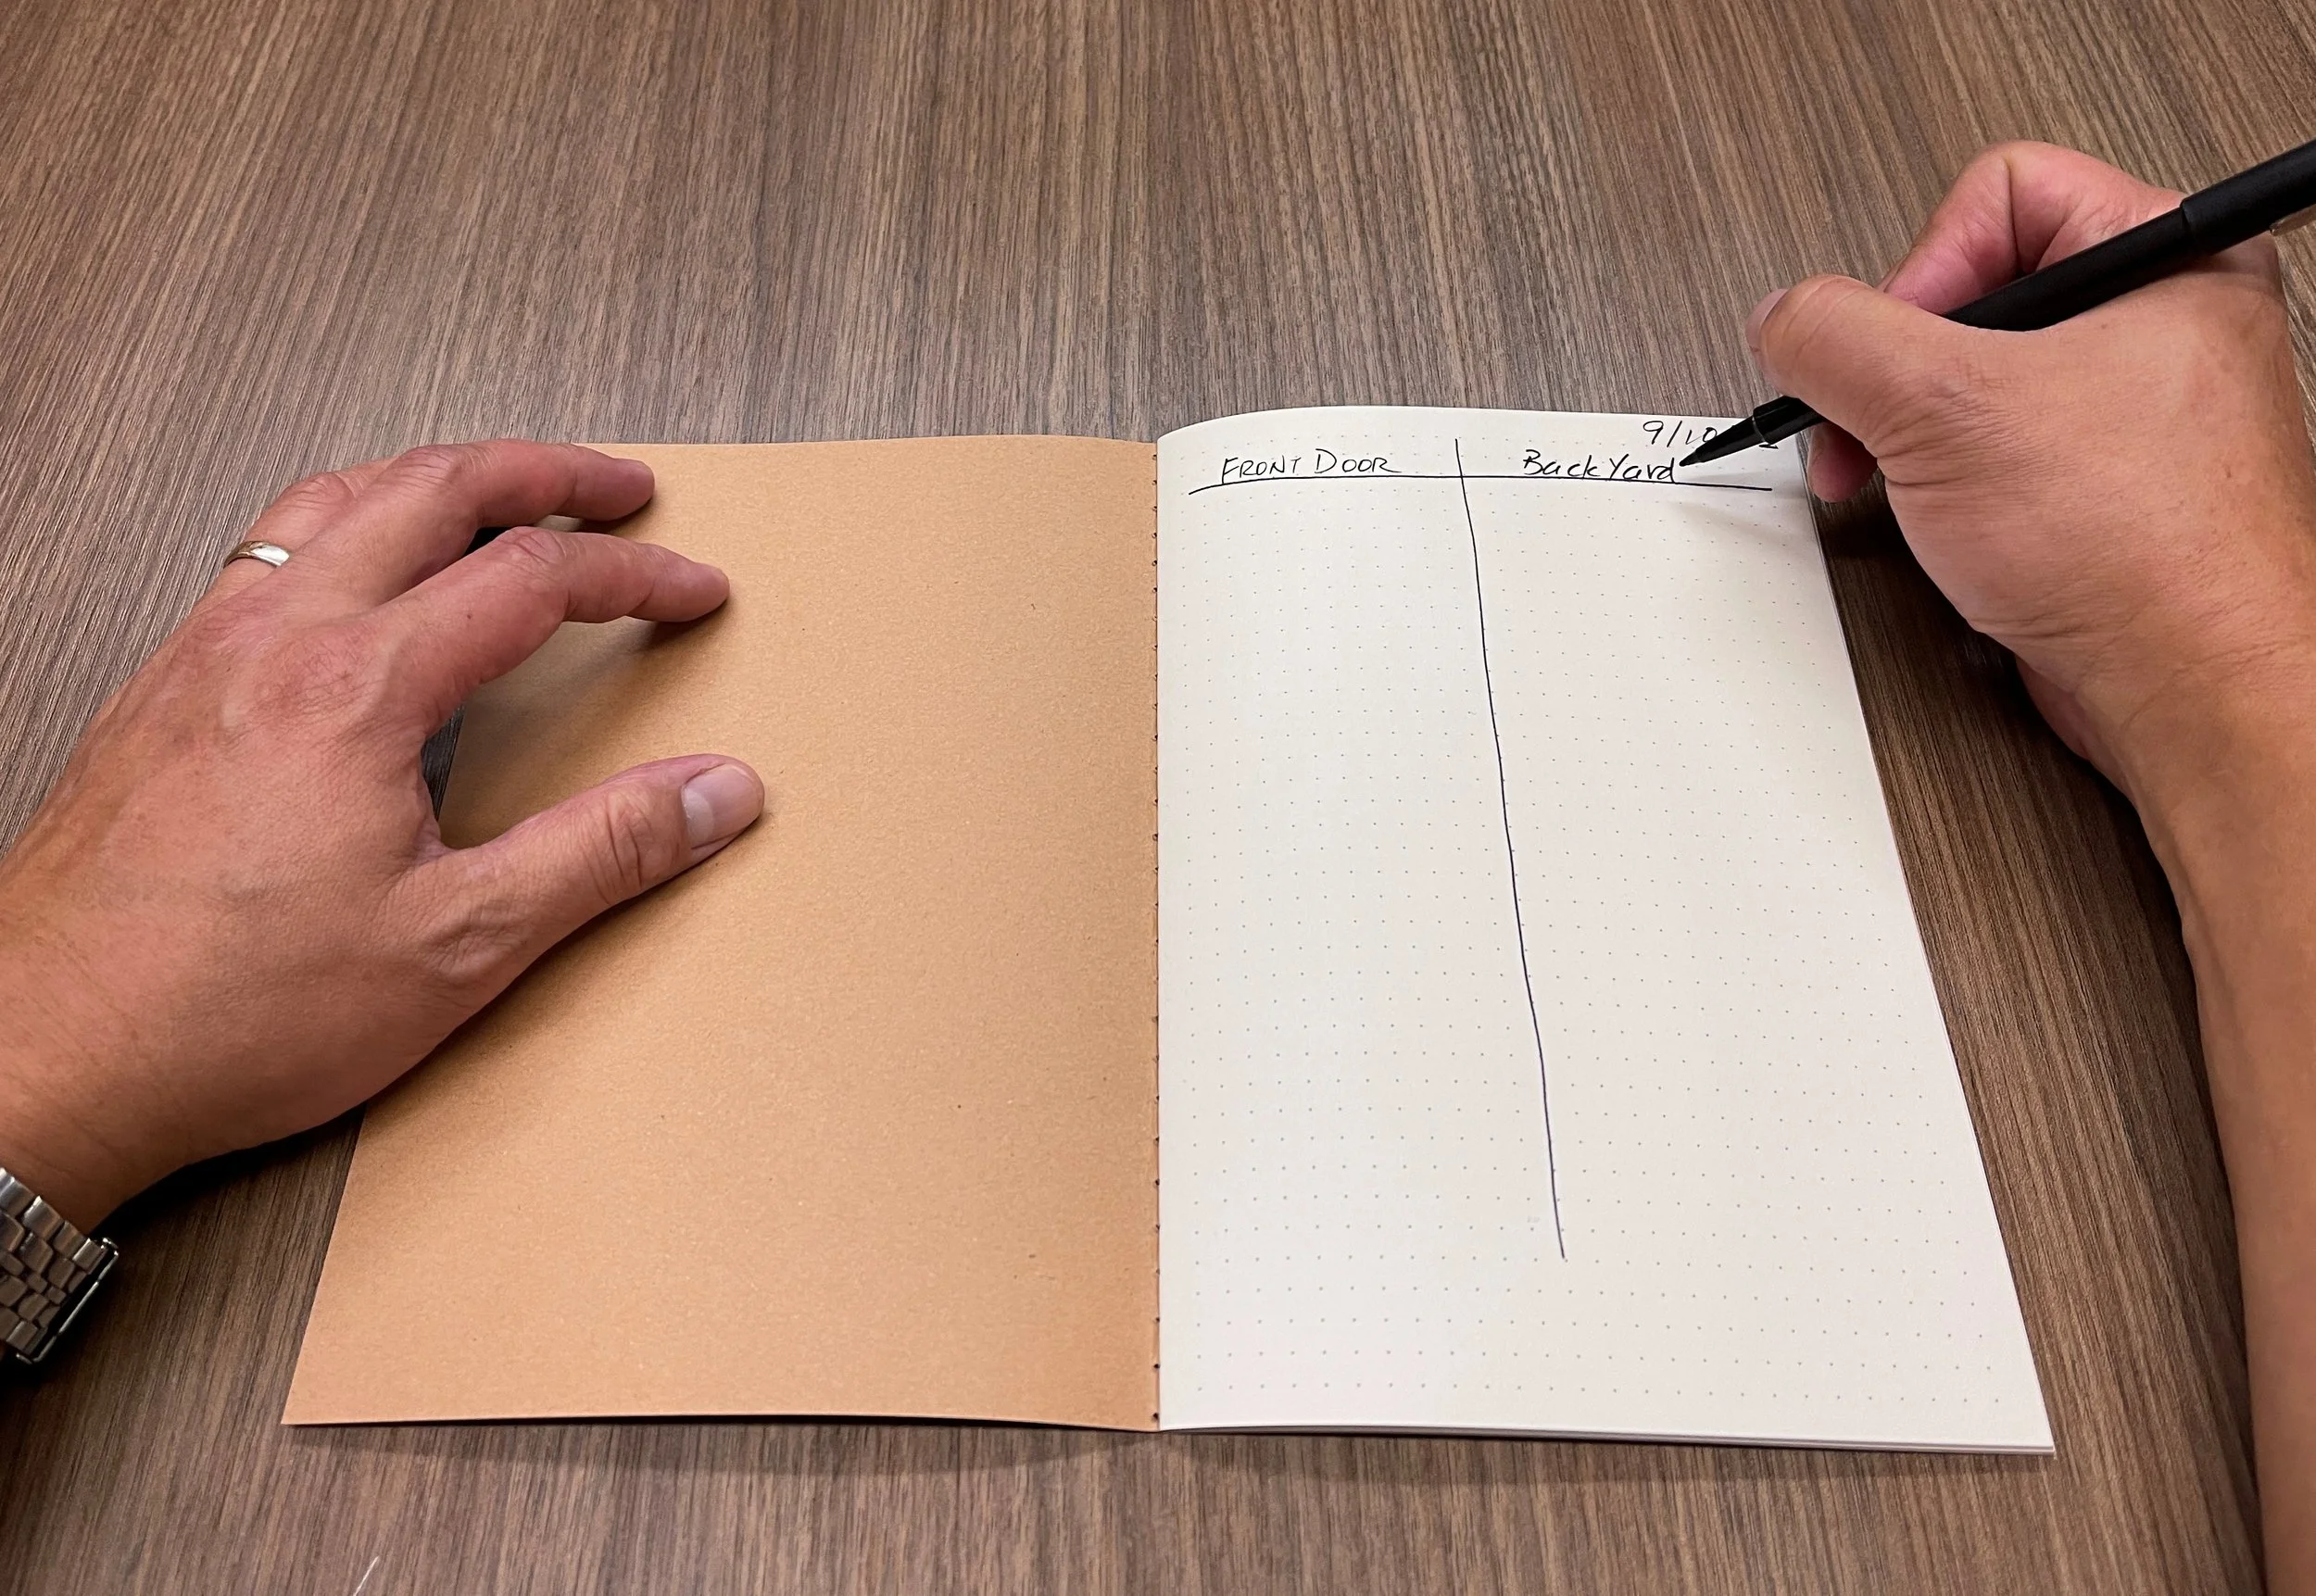
  6. Record the date and areas you’ve hung each card/plate in your lab notebook. (See Figure 5)

  7. After 3-7 days, retrieve your pollution catchers.

  8. Using your magnifying glass, look at each card/plate. You will most likely find some amount of particles stuck to the pollution catcher. Record your answer to each question in your lab notebook.

    • Are there a lot of particles or just a few?

    • How do you think the area you’ve chosen to perform the experiment in has affected your results?

    • What do you think would happen if you performed this experiment in a heavily polluted area, such as a big city or an area with known air pollution? Do you think you would find more particles stuck to the pollution catcher?

    • How do you think the particles in the air affect the air quality and our ability to breathe well?

    • Why is reducing air pollution important? What can you do to help reduce air pollution?

Figure 1: Sting your catchers for hanging

Figure 2: Label your catchers

Figure 3: Apply a thin coat of petroleum jelly to one side

Figure 4: Hang your catchers

Figure 5: Record dates, areas, and results in lab notebook


Submit Your STEAM Kit Build Feedback:

After you complete your STEAM Kit Build, complete the feedback survey to be entered into a quarterly raffle!