STEAM Ahead - Science STEAM Kits

STEAM KIT INTRODUCTION: 

This STEAM kit is designed to introduce students to two areas of Science: Genetic Engineering and Chemistry. Your STEAM kit has the materials for you to complete two activities: DNA Extraction and Rocket Explosion.

Select your activity below for instructions and additional information:


warren-umoh--qycBqByWIY-unsplash.jpg

Strawberry DNA Extraction

Genetic Engineering is the modification and manipulation of an organism's genes using technology. Genes are made up of deoxyribonucleic acid, also know as DNA. DNA is a molecule that contains the genetic code for the development and functioning of an organism.

DNA is made up of four chemical bases: adenine (A), guanine (G), cytosine (C), and thymine (T). In humans, there are about 3 billon bases. The DNA bases pair up with each other to form base pairs — A with T and C with G.

Source: Healthline

Each base pair attaches to a sugar and phosphate molecule to form a nucleotide. Nucleotides are arranged in two long strands that form a spiral called a double helix, which looks like a ladder. The base pairs form the ladder’s rungs and the sugar and phosphate molecules form the vertical sides of the ladder. The order of the bases in a strand of DNA makes up a “sequence.” Knowing a DNA’s sequence is important because it tells scientist the kind of genetic information carried in that particular DNA segment.

DNA extraction is the process that scientist use to extract DNA from other cellular components so they can study it. There are various techniques to extract DNA but they all include 3 main steps:

  • Lysis of cell wall and nuclear membrane - This step breaks down the cell wall and nucleus to release the DNA.

  • Precipitation of DNA - This step separates the DNA from cellular debris.

  • Purification of DNA - This step washes and rinses of the DNA so it can be studied and stored .

Did you know?

  • Human beings may look different, but 99.9% of our DNA is the same

  • If one person's DNA was unraveled and placed end to end, it would stretch from Pluto and back.

  • Your DNA is 50% the same as a cabbage


Design Challenge:

Become a Geneticist by creating a DNA extraction kit to extract DNA from strawberries.

  • Do you think you will be able to see the DNA without using a microscope? Why or Why Not?

  • What does each ingredient do? (detergent, salt, alcohol)

  • Try experimenting with another fruit (ie: banana, kiwi etc). Did your results differ? Explain.

Materials included:

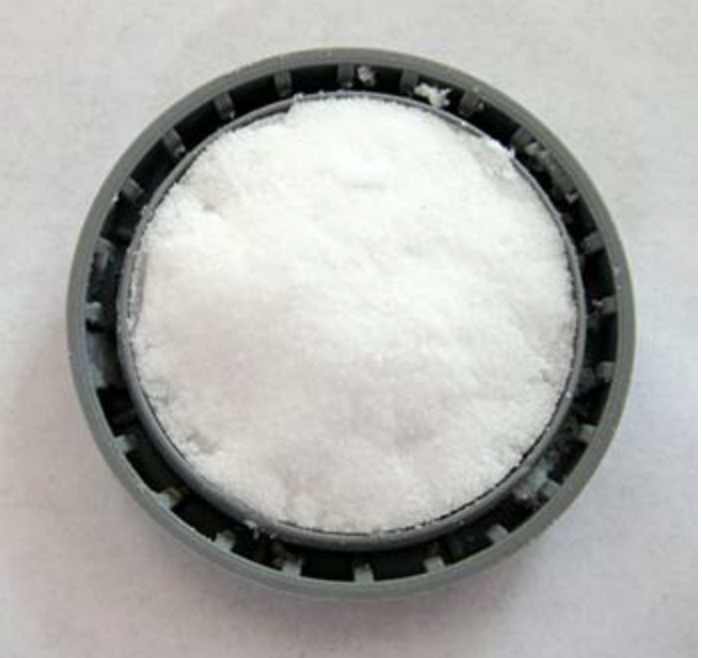
  • 1/2 tsp - Salt

  • Small bowl

  • Cheescloth

  • Funnel

  • Test Tube or small glass

  • Bamboo skewer

Materials Not Included:

  • 3 - Strawberries

  • 1/2 Cup - Isopropyl Rubbing Alcohol, 70%

  • 1/3 Cup - Water

  • 1 Tbsp - Dishwashing Liquid

  • 1 - Measuring Cup


Build Instructions:

  1. Chill the rubbing alcohol in the freezer. (You will need it later.)

  2. Mix ½ teaspoon salt, 1/3 cup water, and 1 tablespoon (tbsp.) dishwashing liquid in a glass or small bowl. Set the mixture aside. This is your extraction liquid.

  3. Line a funnel with the cheesecloth. Put the funnel's tube into a tall glass or test tube (Figure 1)

  4. Remove the green stems from three strawberries, put the strawberries in a plastic, re-sealable sandwich bag, and push out all the extra air. Seal the bag tightly.

  5. With your fingers, squeeze and smash the strawberries for 2 minutes. After this the strawberries should look like Figure 2.

  6. Add 3 tbsp. of the extraction liquid you made in Step 2 to the strawberries in the bag. Push out all the extra air and reseal the bag.

    • The liquid detergent will help break the strawberry cells open, allowing the DNA to spill out. The salt helps create an environment where the different strands of DNA can gather together in a clump, making it easier for you to see them.

  7. Squeeze the strawberry mixture with your fingers for 1 minute. After this the strawberries should look like Figure 3 below.

  8. Pour the strawberry mixture from the bag into the funnel. Let it drip into the glass until there is very little liquid left in the funnel (i.e., only wet pulp remains).

    • You may need to be patient as it can take some time for the liquid to filter through the cheesecloth.

    • Be sure not to let any pulp go around the cheesecloth and end up in the drinking glass below. If this happens, you will need to pour the liquid through the cheesecloth again, into a new drinking glass.

  9. Throw away the cheesecloth and the strawberry pulp inside. Pour the contents of the glass into the test tube or small glass jar so it is 1/4 full.

  10. Tilt the test tube or jar and very slowly pour ¼ cup of cold rubbing alcohol down the side.

    • The alcohol should form approximately a one-inch deep layer on top of the strawberry liquid. Also, do not let the alcohol and strawberry liquid mix.

  11. Study the mixture inside of the test tube or jar. The strawberry DNA will appear as gooey clear/white stringy stuff. Do you see anything in the jar that might be strawberry DNA? If so, where in the jar is it?

    • Hint: You know that the DNA precipitates into the alcohol layer, so that is probably where you will see some DNA.

    • Record your observations in your lab notebook.

  12. You can collect the DNA with a skewer or other thin rod. Dip the bamboo skewer into the test tube to where the alcohol and strawberry layers meet. Pull up the skewer. You should find some whitish, stringy stuff on the skewer, which is DNA containing strawberry genes! Did it work?

    • Record your observations in your lab notebook

Figure 1

Figure 2

Figure 3

Build instructions provided by Science Buddies


Submit Your STEAM Kit Build Feedback:

After you complete your STEAM Kit Build, complete the feedback survey to be entered into a quarterly raffle!

 
spacex-OHOU-5UVIYQ-unsplash.jpg

Rocket Explosion

Chemistry is the science that deals with the composition, structure, and properties of substances and the changes that they go through. Did you know that a chemical reaction enables a spacecraft to be launched into space! This chemical reaction, which occurs within the rocket’s engine, is due to combustion. In the engine, fuel and an oxidizer (a source of oxygen) are mixed and explodes in a combustion chamber. This explosion creates very hot gases which shoot out from a nozzle at the bottom of the rocket and creates thrust which propels the rocket up. The rocket goes up because of Isaac Newton’s third law of motion — every action always has an equal and opposite reaction. In this case, the engine expels the rocket fuel which when burned forms an exhaust that pushes the rocket in the opposite direction!

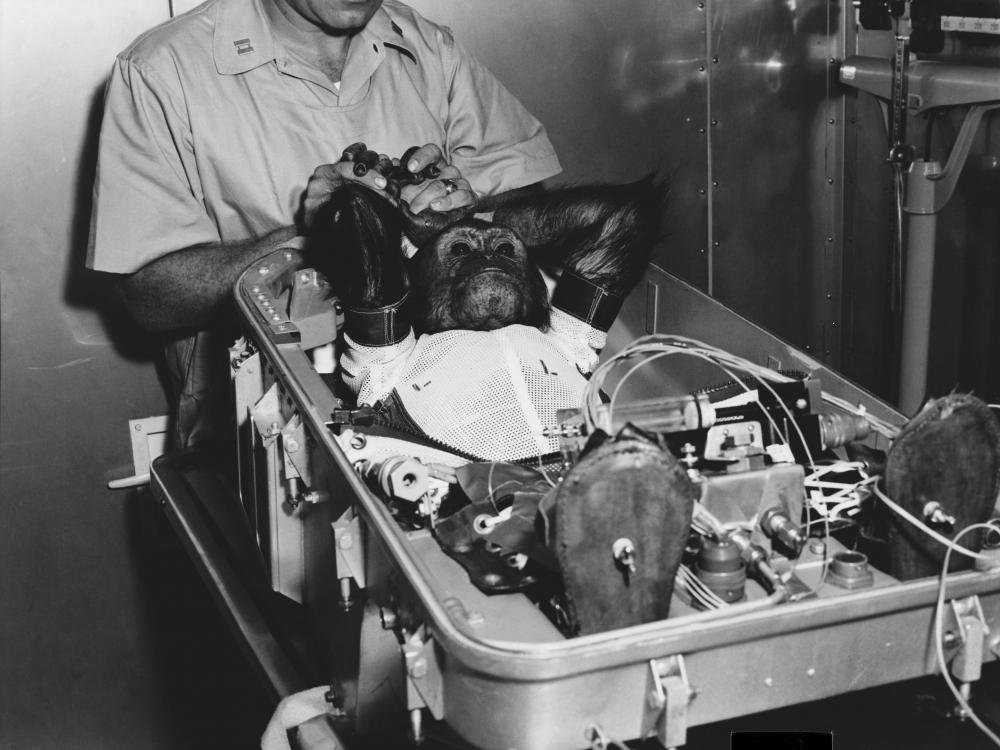
Enos became the first chimpanzee to orbit the Earth. (Source: National Air & Space Museum)

Did you know?

  • The first known rockets were used in China in the 1200s. These solid rockets were used for fireworks and by armies for war.

  • Before sending humans to space, scientists sent dogs and monkeys who wore spacesuits designed just for them!

  • In order to burst through the gravity of Earth, a rocket must travel at speeds of 7 miles per second.


Design Challenge:

Become a Rocket Scientist by creating a chemical reaction to launch your rocket into space.

  • Describe the chemical reaction that caused your rocket to launch.

  • How long did it take your rocket to launch? How high did it go?

  • What ratio of baking soda to vinegar resulted in the highest launch of your rocket?

Materials Included:

  • Plastic Bowl

  • Mixing Spoon

  • Popsicle Stick skewer

  • Construction paper

  • Plastic film canister with a lid and tight seal

  • Markers

Materials Not Included:

  • 1/2 Cup - Baking Soda

  • 1/2 Cup - White Vinegar

  • 1/2 Cup - Water

  • Measuring Spoon

  • Masking tape or painter's tape


Build Instructions:

This experiment can be messy so it is best to perform it outside.

Preparing Your Test Area:

Table 1 - Data table for experiment

  1. Decorate your film canister using markers or take a piece of construction paper and wrap it around the film canister. Make sure to wrap along the short side of the paper, about 2 millimeters below the lip of the canister, and make sure that the lid is not enclosed or covered by the tube of paper. Wrap the paper neatly and evenly along the canister and use the scissors to remove the excess paper from the bottom. Secure the paper with a few pieces of transparent tape.

  2. Now go outside to your test site, which should be an open area next to a tall exterior wall, with nothing above it. Prepare the test site so you will be able to measure how high the rocket goes.

    1. Put a long piece of masking tape or painter's tape on the wall, just 15 centimeters (cm) from the ground. The piece of tape should be about 50 cm long.

    2. Then put a long piece of tape every 15 cm up after that until you reach the top of the wall (or about 4 meters [m] high). Ask an adult to help put up the higher pieces of tape (possibly using a ladder may be needed).

    3. Use the permanent marker to label each piece of tape. For example, the first piece should be labeled "15 cm," the next should be "30 cm," and so on.

  3. Create a data table in your lab notebook so that you can keep track of the data that you collect. It should look like Table 1.

Preparing the Rocket:

1. Now prepare the baking soda for the rocket.

Figure 2 - Tightly pack the damp baking soda in the depression in the lid.

  • Place 1 teaspoon (tsp.) of baking soda in the bowl. Carefully add 1/8 tsp. of water to the baking soda and mix it in using the spoon. This should wet the baking soda enough so that you can pack it into the depression on the inside of the canister lid.

  • Turn the film canister lid over and tightly pack the inside of the depression with the damp baking soda, as shown in Figure 2.

  • Briefly turn the lid upside-down and make sure that the baking soda does not fall out. If the baking soda all falls out, then add a little bit more water to the baking soda and mix it in. Try to add only a minimal amount of water to the baking soda in order to make it stick together inside the lid.

  • If 1 tsp of baking soda is too much (you cannot pack it into the lid without some falling out), start over and try 1/2 tsp of baking soda instead. Make sure you keep this amount constant throughout your experiment.

  • Record the amount of baking soda that you used in the data table in your lab notebook.

2. Now prepare the vinegar for the rocket.

Figure 3 - Fill the film canister with as much vinegar as you can (1 tsp. at a time) without it coming into contact with the baking soda when the lid is put on the canister.

  • Add 1 tsp. of vinegar to the canister at a time, filling it almost to the top. You need to add as much vinegar to the canister as possible without the vinegar and the baking soda coming into contact when you eventually snap the lid onto the canister, as shown in Figure 3. (Tip: Depending on the exact canister, this may be around 5 tsp. of vinegar.) This might take a little trial and error, but be patient and keep trying.

  • Keep careful track of and record the amount of vinegar in the data table in your lab notebook.

3. Go over to the outdoor area where you put tape strips on the wall and ask a volunteer to watch the reactions to help you figure out how high the canisters go.

4. Launch your rocket.

  • Put on your safety goggles. Stoop down near the ground on a flat, hard spot and quickly snap the lid onto the canister to seal it. Immediately turn the canister over so the lid is on the ground, and quickly move away.

  • Wait for the chemical reaction to occur (the time depends on the amount of baking soda and vinegar you are using).

  • When the lid finally pops off, the rocket should overcome gravity and launch. You and your volunteer should watch to see how high it goes and record the launch height in the data table in your lab notebook.

5. Carefully rinse out the lid and canister with water.

  • If your canister is decorated, make sure that the construction paper does not get too wet.

6. Repeat steps 1–5 two more times, always recording the launch height in the data table in your lab notebook.

  • It is a good idea to perform at least three trials of each experiment so that you know your results are accurate and reproducible.

7. Decrease the amount of vinegar in the canister by 1 tsp. and repeat steps 1–6. Record all of the data in the data table in your lab notebook.

8. Once again, reduce the amount of vinegar by 1 more tsp. and repeat steps 1–6. Always record all of the data in your lab notebook.

Analyzing the Data:

  1. If you know how, average the launch height data for each set of trials that you recorded in your data table. Write the averages in the far right column of your data table. Ask an adult if you need help.

  2. Make a bar graph with the amount of vinegar on the horizontal axis and the launch height on the vertical axis.

  3. Analyze your graphs and try to explain your results.

    • Based on your results, what is the ideal amount of vinegar to use?

    • Do you see any trends in your data? If so, can you explain them? Do your trends correlate with other observations you made, such as whether it took a longer or shorter amount of time for a rocket to launch?

Build instructions provided by Science Buddies


Submit Your STEAM Kit Build Feedback:

After you complete your STEAM Kit Build, complete the feedback survey to be entered into a quarterly raffle!